


The studio Kit
By Eugene Struthers


1.png)


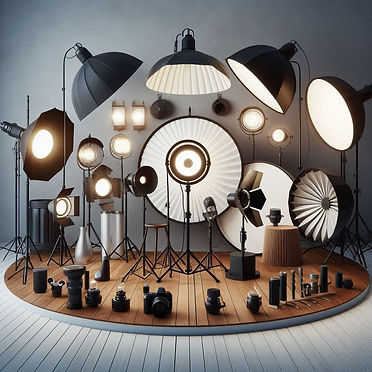
Types of Light Modifiers
Light modifiers are essential tools in photography and videography that help shape, control, and enhance the quality of light. Here is a detailed overview of the different types of light modifiers:
Soft boxes
- Description: Softboxes are enclosures with a reflective interior and a diffusing front panel. They come in various shapes such as rectangular, square, and octagonal.
- Function: They diffuse the light source, creating a soft and even light that reduces harsh shadows.
- Usage: Ideal for portrait photography, product shots, and any situation where soft, flattering light is desired.
Umbrellas
- Shoot-through Umbrellas:
- Description: Made of translucent material, allowing light to pass through.
- Function: Softens and spreads light in a broad, even pattern.
- Usage: Great for general portrait lighting and reducing harsh shadows.
- Reflective Umbrellas
- Description: Feature a reflective interior surface (silver, white, or gold) that bounces light back.
- Function: Creates a more focused and directional light compared to shoot-through umbrellas.
- Usage: Useful for achieving a more controlled light with specific highlights.
Reflectors
- Description: Simple, flat surfaces that bounce light.
- Function: Fill in shadows, add highlights, or even out lighting.
- Types:
- White Reflectors: Provide soft and neutral reflection.
- Silver Reflectors: Offer a bright, specular reflection, adding contrast.
- Gold Reflectors: Add a warm tone to the light, enhancing skin tones.
- Usage: Versatile tools used in portrait, product, and outdoor photography to manage and manipulate
light.
Grids
- Description: Honeycomb or egg crate structures attached to light sources.
- **Function**: Narrow the beam of light, creating a controlled and directional illumination.
- **Usage**: Ideal for spotlighting subjects or creating a focused beam of light for dramatic effects.
Barn Doors
- Description: Four adjustable flaps attached to the sides of a light source.
- Function: Shape the light and control its spread, preventing spill onto unwanted areas.
- Usage: Essential for precise lighting control in studio photography and video production.
Snoots
- Description: Cone-shaped attachments that narrow the light beam.
- Function: Direct the light into a tight, focused spot, creating a dramatic and intense effect.
- Usage: Perfect for highlighting specific areas or adding a spotlight effect in portraits and
product photography.
Gels
- Description: Thin, coloured sheets placed over lights.
- Function: Change the colour temperature or intensity of the light.
- Usage: Used for creative effects, colour correction, and balancing ambient light.
Diffusers
- Description: Translucent materials that scatter light.
- Function: Soften the light source, reducing harshness and creating a gentle illumination.
- Usage: Can be large panels for natural light or smaller attachments for flash units, widely used in both studio and outdoor photography.
Beauty Dishes
- Description: Circular, parabolic reflectors with a central deflector.
- Function: Provide soft yet somewhat directional light with a crisp edge.
- Usage: Popular in fashion and portrait photography for creating a glamorous and well-defined
look.
Parabolic Reflectors
- Description: Deep, parabolic-shaped reflectors that focus light.
- Function: Offer a highly focused and intense light beam, creating dramatic lighting.
- Usage: Suitable for high-contrast images and dramatic effects in portrait and fashion
photography.
Flags and Cutters
- Description: Opaque materials used to block or shape light.
- Function: Control where light falls, preventing spill and creating defined shadows.
- Usage: Essential for precise lighting control in studio setups, allowing for selective illumination.
Scrims
- Description: Semi-transparent fabric stretched over a frame.
- Function: Diffuse and soften light, reducing its intensity.
- Usage: Used to soften sunlight or studio lights, creating a more flattering light for portraits and film.
Cookies (Cucoloris)
- Description: Patterned cutouts placed in front of lights.
- Function: Create interesting shadows and light patterns, adding texture and depth to a scene.
- Usage: Used in both photography and film to simulate natural light filtering through objects like trees
or windows.
Flash Benders
- Description: Flexible reflectors attached to speedlights.
- Function: Shape and direct light from small flash units.
- Usage: Portable and versatile, ideal for on-the-go shooting where quick adjustments are needed.
Bounce Cards
- Description: Small, reflective surfaces attached to flashes.
- Function: Bounce light to soften shadows and create more even illumination.
- Usage: Often used in combination with speedlights for on-camera flash photography, providing a softer light than direct flash.
Using these light modifiers effectively can dramatically enhance the quality of your images and videos by providing control over the light's intensity,
direction, and softness. Each modifier serves a specific purpose, allowing photographers and videographers to achieve the desired lighting effect for any situation.
2. Use Modifiers
Light modifiers such as soft boxes, umbrellas, and beauty dishes can dramatically alter the quality of light. Soft boxes, for example, diffuse the light to create soft, even illumination, while beauty dishes offer a more focused and dramatic light. Experimenting with different modifiers can help you achieve a variety of looks and moods in your images.
Using modifiers effectively is essential in photography to control and shape the quality of light emitted by your light sources, whether they are studio strobes, continuous lights, or natural light. Modifiers can drastically alter the mood, texture, and overall feel of your photographs. Here’s a detailed guide on how to use modifiers to enhance your images:
Types of Modifiers
-
Soft boxes: Soft boxes are one of the most popular and versatile light modifiers. They consist of a translucent fabric stretched over a frame with reflective interiors. Soft boxes produce soft, diffused light that minimizes harsh shadows and creates a flattering illumination. They come in various shapes and sizes, including rectangular, octagonal, and strip soft boxes, each offering different qualities of light.
-
Umbrellas: Umbrellas are another common modifier known for their affordability and ease of use. They come in two types: shoot-through and reflective. Shoot-through umbrellas allow light to pass through the translucent fabric, creating a broad, soft light source ideal for portraits and group shots. Reflective umbrellas bounce light back onto the subject, providing softer illumination compared to direct light sources.
-
Beauty Dishes: Beauty dishes are specialized modifiers designed to produce a soft yet slightly more contrasty light with a distinct circular catchlight in the eyes of the subject. They consist of a shallow dish with a reflective interior and a central deflector plate that diffuses light before it reaches the subject, resulting in a focused yet soft light.
-
Grids: Grids are used to control the spread and direction of light. They attach to the front of soft boxes or beauty dishes and narrow the beam of light, focusing it on the subject while reducing spill onto surrounding areas. Grids are particularly useful for creating dramatic lighting effects or emphasizing specific details without affecting the overall ambient light.
-
Reflectors: Reflectors bounce light back onto the subject, filling in shadows and adding a subtle fill light. They come in various colours and surfaces—white, silver, and gold—each producing a different quality of light. White reflectors provide a soft fill, silver reflectors produce a more specular highlight, and gold reflectors impart a warm, golden tone to the light.
-
Snoots and Barn Doors: These modifiers are used to create narrow, focused beams of light. Snoots are cone-shaped attachments that concentrate light into a small area, ideal for highlighting specific features or creating spotlights. Barn doors are adjustable flaps attached to the front of lights to control the direction and shape of light, preventing spill and enhancing control over lighting.
-
Tips for Using Modifiers Effectively
-
Understand Light Quality: Each modifier affects the quality of light in different ways. Experiment with soft boxes for soft, even illumination, or use grids to create more directional and dramatic lighting effects.
-
Modify Intensity: Adjust the distance between the modifier and your subject to control the intensity of light. Closer distances create more intense light with faster falloff, while greater distances produce softer, more diffused light.
-
Combine Modifiers: For complex lighting setups, combine multiple modifiers to achieve desired effects. For example, use a soft box with a grid to create soft, focused light or pair a beauty dish with a reflector for flattering portrait lighting.
-
Consider Background and Environment: Modifiers not only affect your subject but also influence the overall mood and atmosphere of your photographs. Pay attention to how modifiers interact with backgrounds and ambient light to create cohesive compositions.
-
Practice and Experiment: Mastering modifiers requires practice and experimentation. Take test shots with different modifiers, positions, and power settings to understand their impact on your images. Analyse results and adjust accordingly to refine your lighting techniques.
Practical Applications
-
Portrait Photography: Use soft boxes or beauty dishes for flattering, soft lighting that enhances facial features while minimizing harsh shadows.
-
Product Photography: Employ grids or snoots to highlight specific product details and textures, creating compelling visual narratives.
-
Fashion Photography: Combine umbrellas with reflectors to create dynamic, evenly lit shots that showcase clothing textures and designs.
Conclusion
Modifiers are indispensable tools for photographers seeking to control and manipulate light to achieve specific artistic visions. By understanding the characteristics of different modifiers and mastering their application, you can elevate your photography by creating well-lit, visually striking images that captivate viewers. Remember to experiment with various modifiers, adapt techniques to different shooting scenarios, and continuously refine your skills to harness the full creative potential of light in your photography.


Photography Studio Strobes: Features, Benefits, and How to Use Them
In the world of studio photography, lighting is a crucial element that can make or break an image.
Among the various lighting options available, studio strobes stand out for their power, versatility,
and ability to transform an ordinary scene into an extraordinary one. This article delves into the
features and benefits of using studio strobes and provides detailed tips on how to make the most
of them in your photography.
What Are Studio Strobes?
Studio strobes, also known as flash heads or monolights, are high-powered flash units designed
specifically for use in studio environments. Unlike continuous lights that stay on constantly, strobes
emit a brief but intense burst of light. This burst is synchronized with the camera's shutter to illuminate
the scene precisely when the photo is taken. Studio strobes are essential for achieving professional quality
lighting, providing photographers with the control and flexibility needed to create stunning images.
Key Features of Studio Strobes
1. Power and Output
Studio strobes are known for their high power output, typically measured in watt-seconds (Ws). The power output determines the intensity and reach of the light. Popular models like the Profoto D2 or the Godox AD600Pro offer power outputs ranging from 200Ws to 1200Ws, providing ample light for even the most demanding shoots. High power output allows photographers to use smaller apertures and lower ISO settings, resulting in sharper images with less noise.
2. Adjustable Power Settings
Most strobes come with adjustable power settings, allowing photographers to control the intensity of the light precisely. This feature is crucial for achieving the desired exposure and creative effects. For instance, lowering the power can create a softer, more subtle light, while increasing it can produce a bright, high-contrast look. Many strobes offer power adjustments in fractional increments, giving photographers fine-tuned control over their lighting.
3. Fast Recycle Time
Recycle time refers to the time it takes for a strobe to recharge and be ready to fire again. High- quality strobes boast fast recycle times, often less than a second, which is essential for capturing action shots or working with fast-paced subjects. Fast recycle times ensure that photographers don't miss crucial moments and can maintain a steady shooting rhythm during high-energy shoots.
4. Colour Consistency
Studio strobes are designed to produce consistent colour temperature, typically around 5500K, which mimics daylight. This consistency ensures that colours appear natural and uniform across multiple shots. Consistent colour temperature is especially important in commercial and product photography, where accurate colour representation is critical.
5. Built-In Modifiers
Many strobes come with built-in modifiers or are compatible with a variety of light modifiers such as soft boxes, umbrellas, and reflectors. These accessories help shape and diffuse the light to achieve the desired look. For example, soft boxes provide soft, even illumination that reduces harsh shadows, while reflectors can bounce light to fill in shadows and create a more balanced exposure.
6. Remote Triggering
Modern strobes often include wireless remote triggering capabilities, allowing photographers to control the flash from a distance. Systems like the Pocket Wizard Plus III are popular for this purpose. Remote triggering provides flexibility in light placement and makes it easier to adjust settings without constantly moving back and forth between the camera and the lights.
Benefits of Using Studio Strobes
1. Control Over Lighting
Studio strobes offer unparalleled control over lighting conditions. Photographers can adjust the power,
direction, and quality of the light to match their creative vision. This level of control is difficult to achieve
with natural or continuous light sources. For instance, studio strobes can be used to create dramatic
lighting effects, such as high-contrast chiaroscuro or soft, flattering portrait lighting.
2. Freeze Motion
The brief, intense burst of light from a strobe can freeze fast-moving subjects, making it ideal for
capturing sharp, dynamic images. This is particularly useful in fashion, sports, and wildlife photography,
where motion can be a significant factor. Freezing motion with strobes allows photographers to capture
crisp, detailed shots of subjects in action, from a model's twirl to a leaping athlete.
3. Consistent Results
With studio strobes, photographers can achieve consistent lighting from shot to shot. This consistency is
crucial for professional work, especially in commercial and product photography, where uniformity is
essential. Consistent lighting ensures that all images in a series match in exposure and colour balance,
making post-processing easier and more efficient.
4. Versatility
Studio strobes are incredibly versatile and can be used in various settings and genres of photography, from portraits and fashion to still life and macro photography. Their adjustable power and compatibility with modifiers make them suitable for a wide range of applications. Whether you're shooting a delicate flower or a high-energy dance routine, strobes provide the flexibility to adapt to different lighting needs.
5. Professional Quality
The high power output and precise control offered by studio strobes contribute to producing professional-quality images with crisp details and rich colours. This quality is often required for high-end commercial and editorial work. Professional-quality lighting enhances the overall look of the images, making them more appealing and marketable.
How to Use Studio Strobes Effectively
1. Understand Light Placement
Positioning your strobes correctly is crucial for achieving the desired lighting effect. Experiment with different angles and distances to see how the light interacts with your subject. Key lighting setups include:
Rembrandt Lighting: Creates a triangle of light on the cheek opposite the light source, adding depth and dimension.
Butterfly Lighting: Places the light directly in front and above the subject, creating a butterfly-shaped shadow under the nose.
Split Lighting: Illuminates one side of the face while leaving the other in shadow, creating a dramatic effect.
Understanding light placement is fundamental in photography as it directly influences the mood, depth, and overall feel of your images. Whether you're using natural light, studio strobes, or continuous lights, knowing how to position light sources effectively can make a significant difference in the quality of
your photographs.
Here’s a detailed guide on understanding light placement and its
1. Types of Light Placement
a. Front Lighting
-
Description: Front lighting illuminates the subject directly from the front. This placement ensures even illumination across the subject's face or object, minimizing shadows and creating a straightforward, easily readable image.
-
Applications: Front lighting is commonly used in portrait photography, product photography, and documentation where clarity and detail are essential. It provides a clean, well-lit look with minimal shadows, making it ideal for showcasing details and textures.
b. Side Lighting
-
Description: Side lighting positions the light source to the side of the subject, creating strong highlights and shadows. This placement adds depth, dimension, and texture to the subject by emphasizing contours and creating a sense of drama.
-
Applications: Side lighting is popular in portrait and fashion photography for creating mood and emphasizing facial features or clothing textures. It can also be effective in still life photography to enhance surface details and create visual interest.
c. Backlighting
-
Description: Backlighting places the light source behind the subject, facing the camera. This placement creates a rim or halo of light around the edges of the subject, separating it from the background and adding depth to the image.
-
Applications: Backlighting is commonly used to create silhouettes, highlight hair or outlines, and add a sense of depth and drama to the composition. It can be particularly effective in portrait photography to create a sense of separation between the subject and the background.
d. Overhead Lighting
-
Description: Overhead lighting positions the light source directly above the subject, casting light downwards. This placement creates strong shadows under the eyes, nose, and chin, which can add drama and depth to the subject's facial features.
-
Applications: Overhead lighting is often used in studio setups for dramatic portraits, emphasizing facial contours and creating bold lighting patterns like butterfly lighting (where a small, butterfly-shaped shadow is cast under the nose).
e. Diffused and Reflected Lighting
-
Description: Diffused lighting involves using modifiers like softboxes, umbrellas, or reflectors to soften and scatter light across the subject. Reflected lighting bounces light off a surface (such as a reflector or white wall) to fill in shadows and create a more even illumination.
-
Applications: Diffused and reflected lighting are versatile and can be used in various photography genres, including portraits, product photography, and outdoor shoots. They provide softer, more flattering light while reducing harsh shadows and emphasizing details.
2. Factors Influencing Light Placement
-
Subject and Composition: Consider the subject's features, clothing, and the desired mood of the photograph when choosing light placement. Different placements can highlight or downplay specific aspects of the subject.
-
Light Source Characteristics: Understand the quality (softness or harshness), intensity, and color temperature of your light source. Modify these characteristics using modifiers to achieve the desired effect.
-
Environment and Background: Take into account the surroundings and background of your scene. Light placement can affect how the background interacts with your subject and contribute to the overall atmosphere of the image.
3. Practical Tips for Light Placement
-
Experimentation: Don't be afraid to experiment with different light placements to discover what works best for your subject and style. Take test shots and review them to evaluate the effects of each placement.
-
Adjustment: Small adjustments in light placement can make significant differences in the final image. Move your light source slightly and observe how it affects shadows, highlights, and overall composition.
-
Consistency: When shooting a series of images, maintain consistency in light placement to ensure a cohesive look and feel throughout your work. This helps in creating a professional and polished portfolio.
4. Applying Light Placement in Different Photography Genres
-
Portrait Photography: Use side or overhead lighting to sculpt facial features and create mood. Experiment with backlighting to add depth and separation from the background.
-
Product Photography: Front or diffused lighting is often used to showcase product details and textures. Consider using reflectors to fill in shadows and create a more even illumination.
-
Landscape Photography: Understand how natural light interacts with the landscape. Position yourself to take advantage of golden hour lighting or use artificial lighting to highlight specific elements.
Conclusion
Mastering light placement is essential for photographers seeking to create compelling and impactful images. By understanding the different types of light placement, factors influencing their effectiveness, and practical application tips, you can enhance your photography skills and effectively convey your creative vision through light. Remember to practice regularly, experiment with various placements, and analyze the results to refine your technique and achieve outstanding photographic results.
---------------------------------------------------------
Types of Studio Umbrellas:
1. Reflective Umbrellas:
- Silver Umbrellas: These umbrellas have a highly reflective silver interior coating that efficiently bounces light towards the subject. Silver umbrellas produce a strong, contrasty light with defined shadows, making them ideal for creating dramatic portraits or emphasizing textures in product photography.
- White Umbrellas: White umbrellas feature a neutral white interior that diffuses light more gently compared to silver umbrellas. They produce soft, even illumination with minimal shadows, making them versatile for various types of photography, including portraits, fashion, and still life.
- Gold Umbrellas: Gold umbrellas have a warm-toned reflective surface that imparts a golden hue to the light. They are used to create a warm, flattering glow, often preferred in portrait photography or for enhancing skin tones.
2. Shoot-Through (Translucent) Umbrellas:
- Shoot-through umbrellas have a translucent fabric canopy that allows light to pass through and diffuse evenly. They produce a broader, softer light compared to reflective umbrellas, making them popular for portrait photography, group shots, and general studio use where soft, flattering light is desired.
Benefits of Studio Umbrellas:
1. Soft and Even Lighting: One of the primary advantages of umbrellas is their ability to create soft, diffused light. This quality helps in minimizing harsh shadows and producing smooth transitions between light and shadow on your subject.
2. Versatility: Umbrellas are versatile tools that can be used for a variety of lighting setups. They serve as key lights, fill lights, or background lights depending on their placement and type. This versatility makes them essential for both beginners and seasoned photographers.
3. Affordability: Compared to other light modifiers like softboxes or octaboxes, umbrellas are generally more affordable while still delivering excellent light quality and versatility. They provide a cost-effective solution for achieving professional lighting results.
4. Ease of Use: Setting up and using umbrellas is straightforward and user-friendly, making them accessible to photographers of all skill levels. They can be quickly assembled, mounted on light stands, and adjusted to achieve the desired lighting effect.
5. Light Control: Reflective umbrellas allow you to control the direction and intensity of light by adjusting the umbrella's position and angle relative to the subject. Shoot-through umbrellas offer broader coverage and softer light diffusion, ideal for creating a natural, pleasing light.
Features to Consider:
1. Size: Umbrellas come in various sizes, from small, compact versions for portability to large
umbrellas for full-body portraits or group shots. Larger umbrellas produce softer light due to
their broader surface area, while smaller umbrellas are more portable and easier to handle.
2. Material and Durability: Choose umbrellas made from durable materials such as nylon or
polyester for shoot-through varieties and a sturdy metal frame for reflective umbrellas.
This ensures longevity and reliability, especially with frequent use in studio environments.
3. Mounting Compatibility: Ensure the umbrella has a universal mount that fits standard
light stands and is compatible with your studio strobes or speedlights. Some umbrellas
come with adapters or adjustable mounts to accommodate different lighting setups.
Practical Uses of Studio Umbrellas:
- Portrait Photography: Umbrellas are indispensable for portrait photographers,
providing soft, flattering light that enhances skin tones and minimizes imperfections.
White and shoot-through umbrellas are particularly popular for creating natural-looking
portraits.
- Product Photography: Reflective umbrellas are effective for product photography, highlighting details and textures with controlled contrast. Shoot-through umbrellas provide even illumination for product shots, ensuring products are well-lit and visually appealing.
- Group Photography: Large umbrellas are essential for illuminating groups of people evenly, ensuring everyone is well-lit without harsh shadows. They provide consistent lighting across a wide area, making them ideal for group portraits or team photos.
Tips for Using Studio Umbrellas Effectively:
- Distance and Angle: Adjust the distance between the umbrella and the subject, to control light intensity and softness. Experiment with different angles to achieve the desired lighting effect, whether it's direct or bounced light.
- Combining with Other Modifiers: Mix umbrellas with reflectors, grids, or gels to create customized lighting setups and effects. Experimenting with different combinations allows you to achieve unique and creative lighting styles.
- Outdoor Use: While primarily used indoors, umbrellas can also be effective outdoors for portrait sessions or on-location shoots. They can help soften harsh sunlight or create shaded areas for consistent, flattering lighting.
Conclusion:
Studio umbrellas are indispensable tools for photographers seeking to control and modify light effectively. Whether you choose reflective umbrellas for their contrast and drama or shoot-through umbrellas for their soft, even illumination, understanding their types, benefits, and features allows you to elevate your photography and achieve professional-quality results. By mastering the use of umbrellas and integrating them into your lighting setups, you can create visually compelling images across various genres and artistic styles.
------------------------------------------
Positioning your strobes correctly is crucial for achieving effective lighting in photography. Whether you're aiming for a classic portrait setup or a more dramatic effect, understanding different lighting setups like Rembrandt, Butterfly, and Split lighting can significantly enhance the mood and visual impact of your images. Here’s an expanded and detailed guide on how to achieve these lighting setups using strobes:
1. Rembrandt Lighting
Rembrandt lighting is characterized by a triangle of light on the cheek of the subject opposite the light source. This lighting setup adds depth and dimension to portraits, creating a classic and flattering look.
How to Achieve Rembrandt Lighting:
-
Positioning: Place your key light (main light source) at a 45-degree angle to the side of
-
your subject, slightly higher than eye level. This angle ensures that one side of the face
-
is illuminated while the other side falls into shadow, creating contrast.
-
Lighting Angle: Adjust the angle of your strobe to achieve a triangle of light on the cheek
-
opposite the light source. The triangle should ideally form under the eye on the shadowed
-
side of the face, extending from the cheekbone to the nose.
-
Modifier: Use a softbox or beauty dish to diffuse the light and create a soft, flattering
-
illumination. This helps to smooth out harsh shadows and maintain a natural appearance
-
while highlighting facial contours.
-
Adjustment: Fine-tune the position and intensity of your strobe to control the size and shape
-
of the Rembrandt triangle. Move the light closer to soften shadows or further away to increase
-
the contrast.
Applications:
Rembrandt lighting is ideal for portrait photography, especially when you want to emphasize the subject’s facial structure and create a sense of depth. It works well for both studio portraits and outdoor portraits where you can control the direction and quality of light.
2. Butterfly Lighting
Butterfly lighting is named for the distinctive shadow it creates under the subject’s nose, resembling the shape of a butterfly. This setup provides a classic and symmetrical look, often used in fashion and beauty photography.
How to Achieve Butterfly Lighting:
-
Positioning: Position your key light directly in front of and above the subject, slightly
-
angled downwards. This placement ensures that the light falls evenly across the face,
-
creating a symmetrical butterfly-shaped shadow under the nose.
-
Height Adjustment: Raise the light source to a higher position to achieve a more
-
pronounced butterfly shadow. This height also helps to minimize shadows under the
-
chin and neck, creating a clean and elegant look.
-
Modifier: Use a large softbox or umbrella to soften the light and reduce harsh shadows.
-
This produces a soft, flattering light that enhances the subject’s features while
-
maintaining a natural appearance.
-
Distance: Experiment with the distance between the light source and the subject to
-
control the intensity and spread of light. Closer distances create softer light, while further
-
distances increase contrast.
Applications:
Butterfly lighting is commonly used in fashion and beauty photography to create a glamorous and polished look. It accentuates facial features, especially cheekbones and jawlines, and is well-suited for portraits where symmetry and softness are desired.
3. Split Lighting
Split lighting is characterized by illuminating one side of the subject’s face while leaving the other side in shadow. This setup creates a bold and dramatic effect, emphasizing contrasts and adding intensity to the image.
How to Achieve Split Lighting:
-
Positioning: Position your key light to the side of the subject, either to the left or right,
-
at a 90-degree angle. This placement ensures that one side of the face is fully illuminated,
-
while the other side remains in shadow.
-
Lighting Angle: Adjust the angle of your strobe to control the division between light and
-
shadow. A sharper angle creates a more pronounced split, whereas a slight adjustment
-
can soften the transition for a more subtle effect.
-
Modifier: Use a grid or snoot to narrow the beam of light and precisely control its direction.
-
This helps to focus the light on the subject’s face and reduce spill onto the background,
-
enhancing the dramatic impact.
-
Intensity: Adjust the power of your strobe to balance the contrast between light and shadow.
-
Higher power settings create more defined shadows, while lower settings produce a softer,
-
more gradual transition.
Applications:
Split lighting is ideal for creating bold and dramatic portraits that emphasize contrasts and facial features. It adds depth and intensity to the image, making it suitable for artistic portraits, character studies, and moody photography styles.
Practical Tips:
-
Experimentation: Don’t hesitate to experiment with different angles, distances, and modifiers to achieve the desired lighting effect. Take test shots and adjust your setup based on the results.
-
Understanding Shadows: Pay attention to how shadows fall on the subject’s face and adjust your lighting accordingly to enhance or reduce their impact.
-
Practice: Mastering these lighting setups takes practice and patience. Continuously refine your technique by studying light patterns and analyzing the effects of different setups on your subjects.
By mastering these key lighting setups—Rembrandt, Butterfly, and Split—you can expand your creative toolkit in portrait photography and effectively control the mood, depth, and visual impact of your images using strobes. Experimentation and practice are key to refining your skills and achieving professional-quality results in your photography.

3. Balance Ambient and Strobe Light
When working in environments with ambient light, learn to balance it with your strobes.
This can be achieved by adjusting the power of the strobes or using ND filters on your camera
to reduce ambient light without affecting the flash exposure. Balancing ambient and strobe light
allows for more natural-looking images and can help integrate the subject with the background
more seamlessly.
Balancing ambient light with strobe light is a fundamental skill in photography, especially in
situations where you want to create natural-looking images or integrate your subject seamlessly
with the background.
Here’s a detailed guide on how to effectively balance ambient and strobe light:
Understanding Ambient Light
Ambient light refers to the existing natural or artificial light in a scene before any additional lighting (such as strobes) is added. It sets the overall mood and provides context to your photograph. Examples of ambient light sources include sunlight, room lighting, street lights, or any other light present in the environment.
Using Strobes to Enhance Ambient Light
Measure Ambient Light: Begin by assessing the existing ambient light in your scene. Use your camera’s light meter or a handheld light meter to determine the intensity of the ambient light. This reading serves as your baseline for exposure without any additional lighting.
Set Strobe Power: Decide on the role of your strobes in the shot. Are they meant to be the primary light source, or do you want them to complement and enhance the ambient light? Adjust the power settings of your strobes accordingly. Typically, you may start with lower power settings to fill in shadows or add a subtle highlight to your subject without overpowering the ambient light.
Positioning Strobes: Place your strobes strategically to achieve the desired lighting effect. For example, if you’re shooting outdoors during golden hour (the hour after sunrise or before sunset), the natural light may be warm and soft. Positioning a strobe with a warm gel can help mimic this quality and provide additional fill light to balance out harsh shadows.
Modify Strobes: Use light modifiers such as soft boxes, umbrellas, or reflectors to control the quality of light from your strobes. Diffusing the light with a soft box can create a softer, more natural-looking illumination that blends well with ambient light. Conversely, using a reflector can bounce strobe light to fill in shadows or add a subtle highlight.
Adjusting Camera Settings: Set your camera settings to achieve a balanced exposure between ambient and strobe light. Start with a low ISO setting (such as ISO 100 or 200) to maintain image quality and reduce noise. Adjust your aperture to control the depth of field and shutter speed to balance the exposure of ambient light with the strobe. For example, if you want to capture the warmth of ambient light while adding a touch of strobe for highlights, you may need to adjust your shutter speed to sync with the strobe's burst.
Practice and Experiment: Balancing ambient and strobe light requires practice and experimentation. Start with simple setups and gradually increase the complexity as you become more comfortable. Take test shots and review them on your camera's LCD screen or tethered to a computer to evaluate the balance of light and make necessary adjustments.
Tips for Specific Situations
Indoor Portraits: Use strobes to provide flattering, even lighting on your subject’s face while adjusting shutter speed and aperture to complement existing indoor lighting.
Outdoor Scenes: During daytime, strobes can help fill in shadows or add catchlights in the eyes of your subject. At night, they can balance harsh artificial lighting or provide creative lighting effects.
Mixed Lighting Environments: When dealing with multiple light sources (e.g., daylight and indoor lighting), adjust your white balance settings to ensure colours appear natural and consistent across the entire frame.
Conclusion
Balancing ambient and strobe light effectively requires an understanding of both light sources and how they interact in your specific shooting environment. By mastering this skill, photographers can achieve natural-looking, well-exposed images that highlight their subjects while maintaining the integrity of the scene’s ambient lighting. Remember to experiment, practice, and refine your technique to develop a keen eye for balancing light sources creatively in your photography.


4. Experiment with Ratios
Lighting ratios refer to the relative intensity of different light sources in your setup. Experimenting with different ratios can help you create depth and dimension in your images. A common starting point is a 2:1 ratio between the key light and the fill light, but you can adjust this ratio to achieve various effects, from high-contrast drama to soft, even lighting.
Experimenting with lighting ratios is a powerful technique in photography that allows you to control the contrast and mood of your images by adjusting the relative intensity of different light sources. Here’s a comprehensive guide on how to experiment with ratios effectively:
Understanding Lighting Ratios
A lighting ratio refers to the relationship between the intensity of your key light (main light source) and your fill light (secondary light source). Ratios are typically expressed as a numerical ratio, such as 1:1 (equal intensity), 2:1 (twice as intense key light), or 1:2 (twice as intense fill light). Understanding and manipulating these ratios allows you to create different lighting effects, from high-contrast drama to soft, even lighting.
Setting Up Your Lighting
-
Key Light Placement: Start by positioning your key light (often a strobe or a powerful continuous light source) to illuminate your subject. The key light usually creates the primary illumination and sets the overall exposure for your image. Experiment with different angles and distances to see how the direction of light affects shadows and highlights on your subject.
-
Fill Light Placement: Next, add your fill light, which is typically used to soften shadows created by the key light. This could be another light source or a reflector bouncing light back onto your subject. Adjust the position and power of the fill light to control the amount of shadow fill and achieve the desired level of contrast.
-
Choosing Ratios: Decide on the lighting ratio you want to experiment with based on your creative vision for the image. Here are a few common ratios and their effects:
-
2:1 Ratio (Key): The key light is twice as intense as the fill light, creating moderate contrast with defined shadows. This ratio adds depth and dimension to portraits while still maintaining a natural look.
-
4:1 Ratio (Key): A higher ratio where the key light is significantly brighter than the fill light. This creates dramatic lighting with strong shadows and highlights, ideal for creating mood or emphasizing texture in your subject.
-
-
1:1 Ratio: Both key and fill lights have equal intensity, resulting in even lighting with minimal shadows. This ratio is often used in portrait photography for a soft, flattering look.
-
Adjusting Power and Modifiers: Once you’ve chosen your ratio, adjust the power settings of your lights accordingly. Use modifiers such as soft boxes, umbrellas, or grids to control the quality and direction of light. For example, a softbox can diffuse light for a softer, more flattering effect, while a grid can focus light for more directional control and sharper shadows.
Tips for Experimentation
-
Start Simple: Begin with basic ratios like 1:1 or 2:1 and gradually increase complexity as you gain confidence. Take test shots to evaluate how each adjustment affects the mood and look of your images.
-
Study Light Placement: Pay attention to how the position of your lights affects the shadows and highlights on your subject. Move lights around and observe how changing angles can create different textures and shapes.
-
Use a Light Meter: A light meter can help you measure the exact intensity of your lights and ensure consistent results when adjusting ratios. This is especially useful in studio settings where precise control over lighting is crucial.
-
Experiment with Backgrounds: Consider how your lighting ratios affect not only your subject but also the background of your image. Adjusting ratios can help you separate your subject from the background or integrate them more harmoniously into the scene.
Practical Applications
-
Portrait Photography: Experiment with different ratios to create flattering lighting that enhances your subject’s features while maintaining natural-looking shadows.
-
Product Photography: Use ratios to highlight textures and details in products, making them more appealing to viewers.
-
Fashion Photography: Achieve dramatic lighting effects that emphasize clothing textures and create a sense of depth on the runway or in editorial shoots.
Experimenting with lighting ratios is a valuable skill that allows photographers to exercise creative control over their images. By understanding how ratios affect contrast, shadows, and overall mood, you can elevate your photography and create compelling, well-lit images that capture the essence of your subject. Remember to practice regularly, analyse your results, and adapt your techniques to suit different shooting conditions and styles.
1/2
3.5
5. Practice and Refine
Using studio strobes effectively requires practice and experimentation. Spend time
understanding how different settings and modifiers affect your images. Refine your
technique through continuous practice and by studying the work of other professional
photographers. Analyse their lighting setups and try to replicate them in your own
work to build your skills and expand your creative toolkit.
Conclusion
Studio strobes are an indispensable tool for photographers looking to elevate their studio
work. Their powerful output, precise control, and versatility make them suitable for a wide
range of photographic applications. By understanding their features and benefits and learning
how to use them effectively, photographers can harness the full potential of studio strobes to
create stunning, professional-quality images. Whether you're capturing portraits, products, or
action shots, studio strobes provide the control and flexibility needed to bring your creative vision to life.


99.png)

Lighting equipment is essential in a studio environment to create professional-quality photographs with controlled illumination. Here’s an in-depth exploration of the various types of lighting equipment and their functionalities:
1. Strobe Lights
Strobe lights are powerful, flash-based light sources that provide consistent and controlled bursts of
light. They are widely used in studio photography for their ability to freeze motion and produce sharp,
well-defined images.
-
Popular Models: Examples include the Profoto D2 and Godox AD600Pro. These strobes offer high
-
output, fast recycling times, and adjustable power settings, making them suitable for a wide range
-
of photography genres from portraits to commercial product photography.
2. Continuous Lights
Unlike strobes, continuous lights emit a constant light output, making them ideal for both photography and videography where continuous illumination is required. They allow for real-time adjustments and are particularly useful in scenarios where capturing motion or maintaining a consistent lighting environment is crucial.
-
Standout Option: The Aputure 120D Mark II is a notable continuous light choice due to its high output, adjustable colour temperature, and quiet operation, making it suitable for various lighting setups.


3. Softboxes and Umbrellas
Softboxes and umbrellas are essential to light modifiers that diffuse and soften the harsh light emitted by strobes or continuous lights. They help create a soft, flattering glow that reduces shadows and provides even illumination across the subject.
-
Examples: The Westcott Apollo Softbox and Neewer Translucent Umbrella are popular choices among photographers. Softboxes produce more directional and controlled light, while umbrellas provide a broader, softer spread of light.
4. Light Modifiers
Light modifiers are tools used to shape and control the quality and direction of light to achieve specific lighting effects.
-
Reflectors: These bounce light back onto the subject to fill in shadows and create a more balanced illumination. The 5-in-1 reflector is versatile, offering different surfaces such as silver, gold, white, and black for various lighting scenarios.
-
Gels: Coloured sheets placed over lights to alter the colour temperature or create mood effects. They are commonly used in creative photography and videography to add ambience or match lighting to a specific scene.
-
Grids and Barn Doors: These accessories attach to the front of light sources to control the spread and direction of light. Grids create a narrow beam of light, ideal for focusing on specific areas or creating dramatic effects. Barn doors adjust the shape and direction of light, minimizing spill and enhancing control over lighting placement.
-
5. Backdrops and Supports
Backgrounds play a crucial role in setting the scene and enhancing the subject in photography. Proper support and choice of backdrop material ensure a professional look and seamless integration with the subject.
-
Backdrop Stands: Provide stability and flexibility for hanging backdrops. They are adjustable
-
and wide to accommodate different shooting setups and backdrop sizes.
-
Seamless Paper: Available in various colours, the seamless paper provides a smooth, uniform
-
background that can be easily replaced for different setups. Brands like Savage Wide Tone
-
Seamless Paper offers a wide range of colour options suitable for various creative needs.
-
Muslin Backdrops: Made from durable fabric, muslin backdrops are versatile and can be
-
draped or stretched to create different textures and effects. They are commonly used in
-
portrait, fashion, and product photography for their versatility and durability.
6. Tripods and Supports
Camera stability is essential for achieving sharp images, especially in studio settings where
precise composition and focus are critical.
-
Tripods: Sturdy tripods like the Manfrotto MT055XPRO3 provide stability and support
-
for cameras and heavy lenses. They allow photographers to adjust height and angle
-
smoothly, ensuring consistent framing and sharp focus.
-
C-Stands: These versatile stands are not only used for holding lights but also for mounting
-
other accessories like flags, reflectors, and even cameras. They offer adjustable height and arm extensions, making them invaluable in studio setups for precise lighting control.
7. Remote Triggers and Tethering
These tools enhance efficiency and workflow management in studio photography by allowing remote control and immediate image review.
-
Remote Triggers: Devices like the PocketWizard Plus III enable photographers to wirelessly trigger strobes or cameras from a distance. They ensure precise timing and synchronization of lighting setups without the need for physical contact.
-
Tethering Cables: Tether Tools cables facilitate direct connection between cameras and computers for instant image transfer and live view shooting. They provide stability and reliability during tethered shooting sessions, allowing photographers to review images immediately on a larger screen for adjustments and client review.
Conclusion
Investing in high-quality lighting equipment and accessories is crucial for achieving professional results in studio photography. Each type of equipment serves a specific purpose in controlling and manipulating light to create desired effects and enhance the visual impact of your photographs. By understanding their functionalities and applications, photographers can effectively utilize these tools to achieve their creative vision and deliver outstanding images across various genres and projects.
Using continuous lights in photography offers distinct advantages and requires a different approach compared to using strobes. Here’s an in-depth guide on how to effectively use continuous lights in your photography:
Advantages of Continuous Lights:
-
Real-time Preview: Continuous lights allow you to see the exact lighting effect in real
time, which is especially beneficial for beginners or when precise control over lighting
and shadows are required.
-
Continuous Lighting for Video: Unlike strobes, continuous lights are ideal for video
production as they provide constant illumination without the need for synchronization
or concerns about flash duration.
-
Ease of Use: Continuous lights are often simpler to set up and use, making them suitable
for photographers who prefer a straightforward approach to lighting.
How to Use Continuous Lights Effectively:
1. Choosing the Right Light
-
Quality of Light: Look for continuous lights that offer adjustable colour temperature and high
CRI (Color Rendering Index) for accurate colour reproduction. For example, the Aputure 120D Mark II is renowned for its high CRI and versatility.
-
Power Output: Consider the power output of the continuous light, which determines its range and intensity. Higher-wattage lights can illuminate larger spaces or provide stronger light for more distant subjects.
2. Lighting Setups
-
Key Light Setup: Position your main light source (key light) to achieve the desired lighting effect. For portraits, place the key light on one side of the subject at an angle that complements their facial features.
-
Fill Light: Depending on the desired look, use additional lights or reflectors to fill in shadows created by the key light. This helps to balance the overall lighting and reduce harsh shadows.
-
Background and Accent Lights: Use additional lights or modifiers to highlight the background or create accents on certain parts of the subject. This adds depth and visual interest to your photos.
3. Modifiers
-
Softboxes and Diffusers: Attach softboxes or diffusers to your continuous lights to create a soft, even light that flatters your subject. Soft light is generally more flattering for portraits as it minimizes skin imperfections and produces smooth transitions between light and shadow.
-
Reflectors: Use reflectors to bounce light back onto the subject, filling in shadows and adding a gentle fill light. Reflectors are particularly useful when working with single-light setups to achieve more balanced lighting.
-
4. Adjusting Settings
-
Colour Temperature: Set the colour temperature of your continuous lights to match the ambient light or to create a specific mood. Adjust warmer temperatures for a cosy atmosphere or cooler temperatures for a modern, high-energy feel.
-
Intensity: Control the intensity of your continuous lights by adjusting power settings or using dimmers. This allows you to fine-tune the lighting to achieve the desired exposure and contrast in your photos.
5. Practical Considerations
-
Model Comfort: Since continuous lights emit heat, ensure your model or subject is comfortable throughout the shoot. Monitor the temperature and adjust as needed to prevent discomfort.
-
Positioning and Experimentation: Experiment with different angles, distances, and heights to find the most flattering and effective lighting setup for your subject. Continuous lights allow for real-time adjustments, so take advantage of this flexibility.
Practical Applications:
-
Portrait Photography: Use continuous lights to create soft, flattering light that enhances facial features and produces natural-looking skin tones. Adjust the position and intensity of lights to achieve different lighting styles such as Rembrandt, Butterfly, or Split lighting.
-
Product Photography: Continuous lights provide consistent illumination for capturing product details and textures without the need to synchronize with camera shutter speeds. Use softboxes and reflectors to control reflections and highlight product features.
-
Video Production: Continuous lights are essential for video shoots as they provide continuous illumination necessary for recording. They allow for seamless transitions between scenes and consistent lighting throughout the production.
Conclusion:
Continuous lights offer photographers and videographers versatility, ease of use, and real-time control over lighting effects. By understanding how to choose the right lights, set up lighting configurations, use modifiers effectively, and adjust settings, you can harness the power of continuous lights to create professional-quality photographs with controlled and flattering illumination. Experimentation and practice will help you master the art of using continuous lights to achieve your creative vision across various photography genres.
Adding a second light source to your photography setup, whether you're using continuous lights or strobes, opens up a range of creative possibilities. Here’s a detailed guide on how to effectively integrate a second light source to enhance your images:
Benefits of Using Multiple Light Sources:
-
Enhanced Control: Multiple lights allow you to independently control different aspects
of your scene, such as key lighting, fill lighting, background illumination, and accents.
-
Dimension and Depth: Adding a second light source enables you to create depth and
separation between the subject and the background, adding visual interest and a
three-dimensional quality to your photos.
-
Creative Flexibility: You can experiment with various lighting setups and styles,
from classic portrait lighting to more dramatic and stylized effects, by strategically
positioning and adjusting each light source.
Steps to Add a Second Light Source:
-
Choose Your Light Sources
-
Consistency: Ideally, use lights with similar colour temperature and output characteristics
to maintain colour consistency across your image.
-
Type: You can use another continuous light or a strobe depending on your needs and the desired effect. Each type offers unique benefits—continuous lights for real-time adjustment and video compatibility, strobes for powerful bursts of light and freezing motion.
2. Positioning and Lighting Setup
-
Key Light (Main Light): Position your main light source (first light) as the primary illumination for your subject. For example, use a softbox or umbrella to create soft, flattering light on your subject’s face.
-
Fill Light: Introduce the second light source (fill light) to soften shadows created by the main light. Place it opposite the main light, at a lower intensity, or use a larger modifier like a reflector or softbox to provide gentle fill without overpowering the main light.
-
Backlight or Rim Light: Consider adding a third light source behind your subject to create separation from the background. This backlight or rim light adds depth and highlights the contours of your subject, making it stand out.
3. Modifiers and Light Control
-
Softboxes and Diffusers: Use modifiers such as softboxes or diffusers on your light sources to control the quality of light. Softboxes create soft, even illumination, while diffusers help to reduce harsh shadows and create a more flattering light.
-
Reflectors: Position reflectors to bounce light back onto your subject or fill in shadows where needed. Reflectors are versatile tools that can help balance lighting and enhance the overall look of your photograph.
4. Adjusting Settings and Testing
-
Power and Intensity: Adjust the power settings of each light source to achieve the desired exposure and balance between lights. Test your setup by taking test shots and reviewing them to make necessary adjustments.
-
Colour Temperature: If using different types of light sources (e.g., strobe and continuous), ensure their colour temperatures match or can be adjusted to maintain colour consistency throughout your image.
5. Practical Applications
-
Portrait Photography: Use multiple lights to create classic portrait lighting setups such as Rembrandt, Butterfly, or Split lighting. Experiment with different angles and intensities to sculpt the subject’s features and add dimension.
-
Product Photography: Use multiple lights to highlight product details and textures, ensuring even illumination and minimizing unwanted shadows. Combine soft lighting with accents to create a polished and professional look.
-
Creative Lighting Effects: Explore creative lighting effects such as silhouette photography, dramatic lighting with strong shadows, or high-key and low-key lighting setups using multiple light sources.
Example Lighting Setup:
-
Main Light: Positioned at a 45-degree angle to the subject, use a softbox or umbrella for soft, directional light.
-
Fill Light: Positioned opposite the main light, use a larger modifier or reflector to provide gentle fill and reduce shadows on the opposite side of the face.
-
Backlight/Rim Light: Positioned behind the subject, use a snoot or grid to create a rim of light around the edges, separating the subject from the background.
Conclusion:
Adding a second light source to your photography setup allows for increased creativity, control over lighting, and the ability to achieve professional-quality results. By understanding how different light sources interact and complement each other, you can effectively enhance your images with depth, dimension, and visual interest. Experiment with various lighting setups, modifiers, and techniques to discover unique ways to illuminate your subjects and create compelling photographs across different genres of photography.
The main light in photography, often referred to as the key light, plays a crucial role in defining the mood, shaping the subject's features, and establishing the overall lighting style of your photograph. Here’s an in-depth exploration of the main light and its significance in photography:
What is the Main Light (Key Light)?
The main light, or key light, is the primary light source in your photography setup. It serves as the foundation of your lighting scheme and directly illuminates your subject. The key light sets the tone for the entire photograph by influencing the contrast, shadows, and highlights of your subject.
Key Characteristics of the Main Light:
-
Directionality: The direction from which the key light comes affects how shadows fall and shape
-
The subject's features. Common directions include:
-
45-degree Angle: Positioned at a 45-degree angle to the subject's face, typically above eye level.
-
This angle creates soft, flattering shadows and highlights facial contours.
-
Side Lighting: Placed to the side of the subject, which can emphasize textures and create dramatic
-
shadows. Side lighting is often used in artistic and moody portraits.
-
Overhead Lighting: Positioned directly above the subject, casting downward shadows. This setup is
-
ideal for dramatic portraits and emphasizing facial structure.
-
3. Quality of Light: The quality of light refers to its softness or harshness, which is influenced by the size
and type of modifier used with the main light. Soft light, produced by large modifiers like softboxes or
umbrellas, creates smooth transitions between light and shadow, while harsh light produces sharp,
defined shadows.
4. Intensity: The brightness or intensity of the main light affects the exposure of your subject. Adjusting
the power output of your light source controls how much light falls on the subject, influencing the overall
exposure of your photograph.
Importance of the Main Light:
-
Defines Subject’s Shape: The main light defines the three-dimensional shape of your subject by
creating highlights and shadows. This helps to separate the subject from the background and adds depth to the image.
-
Sets the Mood: Depending on its placement and characteristics, the main light can evoke different emotions and moods in your photographs. Soft, diffused light creates a gentle and pleasing atmosphere, while harsh light can convey drama and intensity.
-
Controls Contrast: By adjusting the position and intensity of the main light, you can control the contrast between light and shadow. High-contrast lighting creates bold, dynamic images, while low-contrast lighting produces a softer, more subdued look.
Practical Tips for Using the Main Light:
-
Positioning: Experiment with different angles and heights to find the most flattering light for your subject. Consider classic lighting patterns such as Rembrandt, Butterfly, or Split lighting for portraits.
-
Modifiers: Use modifiers like softboxes, umbrellas, or reflectors to shape and control the quality of light. Larger modifiers create softer light, while grids or snoots can focus light for more dramatic effects.
-
Adjusting Power: Control the power output of your main light to achieve the desired exposure and balance with other light sources in your setup. Test different power settings to find the optimal illumination for your subject.
-
Background Control: Use flags, barn doors, or gobos to prevent spill light from the main light onto the background, maintaining separation and controlling the overall mood of the photograph.
Example Lighting Setup with Main Light:
-
Portrait Photography: Position a softbox at a 45-degree angle to the subject’s face, slightly above eye level. Adjust the distance and intensity to create a Rembrandt lighting pattern, with a triangle of light on the cheek opposite the main light source.
-
Product Photography: Place the main light above and slightly in front of the product to minimize shadows and highlight surface textures. Use a large softbox or diffuser to create even illumination across the product.
Conclusion:
Mastering the use of the main light is essential for photographers seeking to create impactful and well-lit images. By understanding its characteristics, experimenting with different setups, and refining your technique, you can effectively control and manipulate light to achieve your creative vision and produce professional-quality photographs across various genres of photography.
Shooting tethered in photography refers to the practice of connecting your camera directly to a computer or monitor via a tethering cable. This setup allows you to instantly transfer images from the camera to the computer as you shoot, providing several advantages for both studio and on-location photography. Here’s a detailed guide on shooting tethered and its benefits:
Benefits of Shooting Tethered:
-
Immediate Image Review: Tethering enables you to view your images on a larger screen immediately after capturing them. This allows for quick assessment of composition, exposure, and sharpness, ensuring you capture the desired result.
-
Enhanced Workflow: Tethering streamlines your workflow by facilitating real-time adjustments to lighting, composition, and camera settings. It reduces the need for guesswork and trial-and-error, leading to more efficient shoots.
-
Client Collaboration: For commercial shoots or studio sessions involving clients, tethering allows clients or art directors to view images in real time. This promotes collaboration, and feedback, and ensures client satisfaction with the results.
-
Technical Precision: Tethering helps in achieving technical precision by enabling precise focus adjustments, exposure bracketing, and histogram analysis on a larger screen. It's particularly useful for critical focus in macro photography, product photography, and other detailed work.
-
Backup and Security: Images are transferred directly to the computer, providing an instant backup and safeguarding against potential loss if something were to happen to the camera's memory card.
How to Shoot Tethered:
Equipment Needed:
-
Tethering Cable: Use a high-quality USB or HDMI tethering cable compatible with your camera model.
Tether Tools and other manufacturers offer cables designed for reliable data transfer and durability.
-
Tethering Software: Install tethering software on your computer. Popular options include Adobe Lightroom,
Capture One Pro, and Canon EOS Utility/Nikon Camera Control Pro (manufacturer-specific software).
-
Computer and Monitor: Use a laptop or desktop computer with sufficient processing power and storage
capacity. Connect a calibrated monitor for accurate colour representation if colour accuracy is crucial.
Steps to Shoot Tethered:
-
Set Up Your Camera:
-
Mount your camera on a stable tripod or secure it in your desired shooting position.
-
Connect the tethering cable to your camera's USB or HDMI port. Ensure the connection is secure.
-
-
Install and Launch Tethering Software:
-
Open your preferred tethering software on the computer.
-
Ensure the software recognizes your camera model and establishes a connection.
-
-
Configure Settings:
-
Customize shooting settings such as file format (RAW/JPEG), white balance, ISO, aperture, and shutter speed directly from the tethering software.
-
Set up file-saving preferences (destination folder, naming conventions) for images captured during the tethered session.
-
-
Begin Tethered Shooting:
-
Start capturing images using either the camera’s shutter button or the capture controls within the tethering software.
-
Images are transferred instantly to the computer and displayed on the monitor for review.
-
-
Review and Adjust:
-
Review each image on the monitor to evaluate composition, exposure, and other details.
-
Make adjustments to lighting, camera settings, or subject positioning based on real-time feedback.
-
-
Backup and Organization:
-
Organize images into folders or collections within the tethering software for easy access and management.
-
Back up files to external drives or cloud storage as needed to maintain data security.
-
-
Collaboration and Client Feedback:
-
Share images with clients or collaborators during the shoot for immediate feedback and adjustments.
-
Use annotations or markups within the tethering software to highlight preferred images or suggest changes.
-
Practical Tips for Shooting Tethered:
-
Check Compatibility: Ensure your camera model is compatible with the tethering software and cable you intend to use.
-
Monitor Calibration: Calibrate your monitor to ensure accurate colour representation, especially for commercial and colour-critical photography.
-
Tethering Stations: Consider using tethering stations or cable management tools to keep cables organized and prevent accidental disconnection during shoots.
-
Backup Strategy: Have a backup plan for power supply, memory storage, and data backup to minimize disruptions during extended tethered sessions.
Conclusion:
Shooting tethered offers numerous advantages for photographers seeking efficiency, precision, and collaborative workflow in both studio and on-location environments. By leveraging tethering technology and implementing best practices, photographers can enhance their creative process, streamline workflow, and deliver high-quality results consistently across various photography genres.


%201.png)
%202.png)


A studio background, also known as a backdrop, is a crucial element in photography studios, providing a controlled environment to isolate subjects and create desired visual effects. Here’s an in-depth exploration of studio backgrounds, their types, uses, and considerations:
Importance of Studio Backgrounds:
-
Isolation and Control: Studio backgrounds allow photographers to isolate subjects from distracting environments, focusing attention solely on the intended subject.
-
Consistency: Using a studio background ensures consistency in images across different sessions or projects, maintaining a professional and polished look.
-
Creative Flexibility: Backgrounds come in various colours, textures, and materials, offering photographers the flexibility to match themes, enhance mood, or create specific visual effects.
Types of Studio Backgrounds:
-
Paper Backdrops:
-
Seamless Paper: Available in rolls of various widths and colours, the seamless paper provides a smooth, uniform background. It is versatile and ideal for high-key or low-key photography. Brands like Savage Widetone offer a wide range of colours.
-
Patterned Paper: Includes designs or textures, adding visual interest without distracting from the subject. Common patterns include faux wood, brick, or abstract designs.
-
-
Fabric Backdrops:
-
Muslin: Made from cotton or polyester, muslin backdrops are durable and versatile.
-
They are available in various colours and are often used for portrait photography due
-
to their soft texture and ability to absorb light.
-
Velvet: Velvet backdrops offer a luxurious, matte texture and are popular for elegant
-
or high-fashion photography due to its rich appearance and minimal reflectivity.
-
-
Vinyl Backdrops:
-
Vinyl: Vinyl backdrops are durable, easy to clean, and come in a variety of textures and
-
patterns. They are suitable for high-traffic studios or commercial shoots where longevity
-
and versatility are key.
-
-
Canvas Backdrops:
-
Canvas: Canvas backdrops provide a textured, painterly background effect.
-
They are commonly used in fine art or themed photography to add depth and character to images.
-
-
Portable Backdrops:
-
Collapsible Backdrops: Lightweight and portable, collapsible backdrops are often made of fabric or vinyl and come with a frame that folds for easy setup and storage. They are popular for location shoots or small studios.
-
Considerations When Choosing a Studio Background:
-
Size and Space: Select a backdrop size that fits your studio space and allows adequate room around your subject for framing and composition.
-
Lighting Compatibility: Consider how different backgrounds interact with studio lighting. Matte surfaces reduce glare and reflections, while glossy surfaces may require careful lighting adjustments to avoid hot spots.
-
Durability and Maintenance: Choose materials that are easy to clean and maintain, especially for high-traffic studios or frequent use. Vinyl and seamless paper are typically more durable and easier to wipe clean than fabric options.
-
Colour and Mood: Select background colours and textures that complement your subject and desired aesthetic. Neutral tones like white, grey, and black provide versatility, while coloured or patterned backgrounds add personality and visual interest.
-
Storage and Portability: Depending on your studio setup, consider how easily the backdrop can be stored, transported, and set up. Collapsible or roll-up backgrounds offer convenience for photographers who work on location or have limited studio space.
Tips for Using Studio Backgrounds Effectively:
-
Distance and Depth: Position your subject at an appropriate distance from the background to minimize shadows and achieve separation. This helps create a sense of depth in your images.
-
Lighting Control: Use flags, barn doors, or gobos to prevent spill light from illuminating the background excessively. This maintains focus on your subject and controls the overall mood of the photograph.
-
Experiment with Textures: Incorporate textured backgrounds like canvas or patterned paper to add visual interest and context to your images, enhancing storytelling and thematic elements.
-
Backdrop Support: Invest in sturdy backdrop stands or wall-mounting systems to ensure stability and safety, especially when using heavy or large backdrops.
Conclusion:
Choosing the right studio background is essential for creating professional-quality photographs with controlled environments and aesthetic appeal. Whether you opt for seamless paper for its simplicity, fabric for its texture, or vinyl for its durability, understanding the characteristics and applications of different types of backgrounds allows you to enhance your photography and meet the specific needs of your projects and clients. By selecting backgrounds that complement your subjects and mastering their use with appropriate lighting and setup, you can achieve visually compelling results across various genres of photography.

